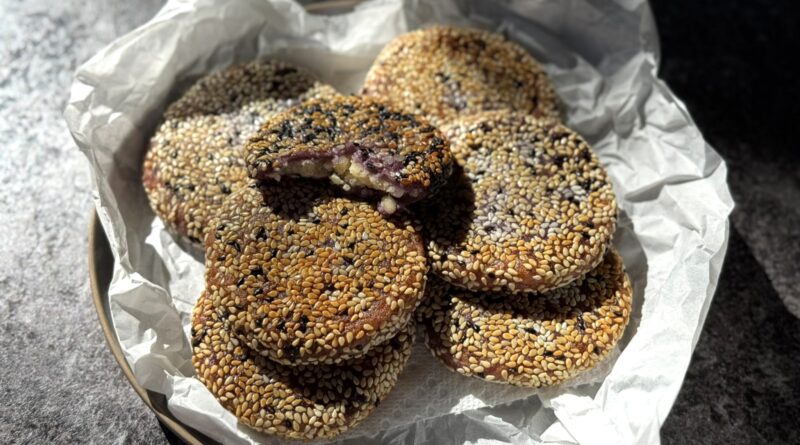
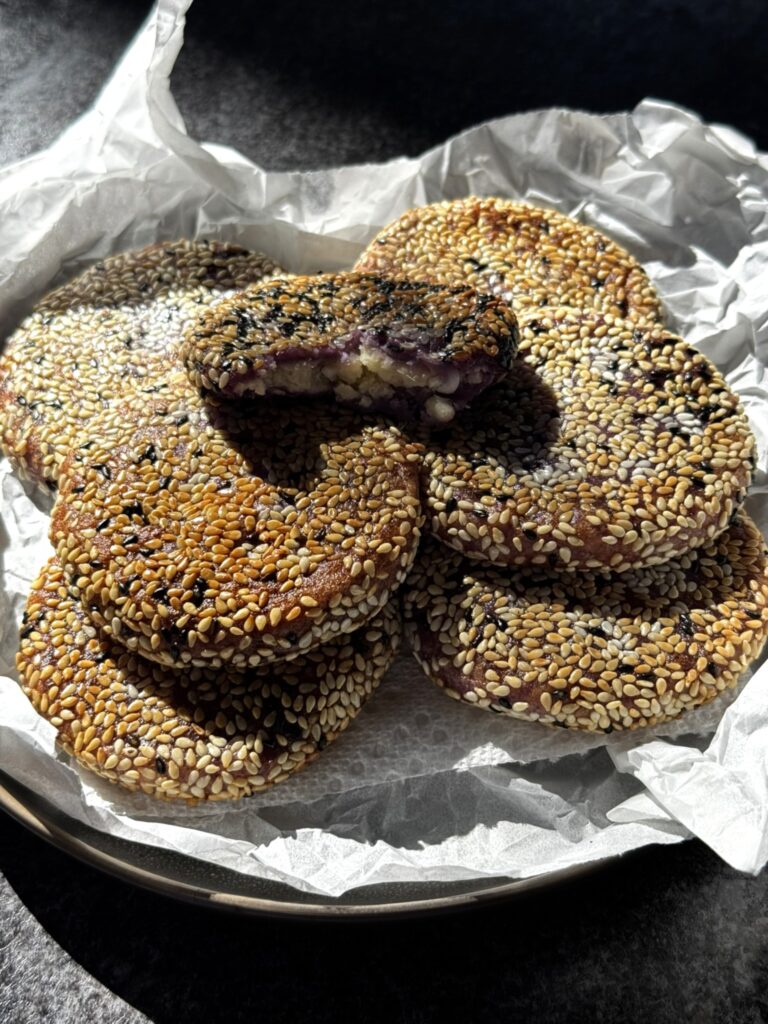
Sticky Rice Cakes
After making bua loy nam king with purple sweet potato dough, I had this idea. One version mom makes includes coconut milk dough with taro filling. Why not make sesame balls that with a sweet potato dough? These sticky rice cakes are a flattened version of sesame balls with the purple sweet potato dough and a mung bean coconut filling.
What I love the most is that these cakes have the most vibrant colors and they’re all natural. In a way they are also like mochi in that they are made with a sticky rice or sweet rice dough and have a bit of chewiness. But you also get creaminess from the sweet potato and mung bean, touch of sweetness, and nuttiness from the coconut and sesame seeds. It’s hard to eat just one.
Notes:
Dough – I find that the glutinous rice flour and sweet potato puree ratio being close to 1:1 by weight yields soft and chewy cakes. For a stickier and chewier version reduce the puree or increase the sticky rice flour to a 2:1 flour to puree ratio by weight.
Flour – I used Erawan brand (green bag). In my opinion, glutinous rice flour, which is actually gluten free, is more forgiving than flours with gluten. Knead the dough until it forms and feels like playdough. If it’s too wet or too dry, it will be hard to form and will fall apart. This will be apparent when you try to work the dough. If it’s too wet, add more flour, if it’s too dry add more water and knead to incorporate.
Filling – Mung bean is my go-to for sesame balls or Kanom khai hong. Any filling that you like will work. In a week’s time I made these with red bean, taro, and coconut brown sugar filling. You can easily use premade red bean filling to save time.
Sesame seeds – I used 3 tablespoons of white sesame seeds and 1 tablespoon of black sesame seeds. Use any combination you like. The mixture of the two is more for aesthetic as both will add nuttiness to the cakes.
Sticky Rice Cakes
Yields: 16-18 rice cakes
Sweet Potato Dough:
1 cup (130 g) glutinous rice flour – (I prefer Erawan brand, green bag)
½ cup (125 g) purple sweet potato purée
½ – ¾ cup (118 – 177 ml) warm water, or depending on liquid content of potato purée
1-2 tablespoons sugar (optional depending on sweetness of potato)
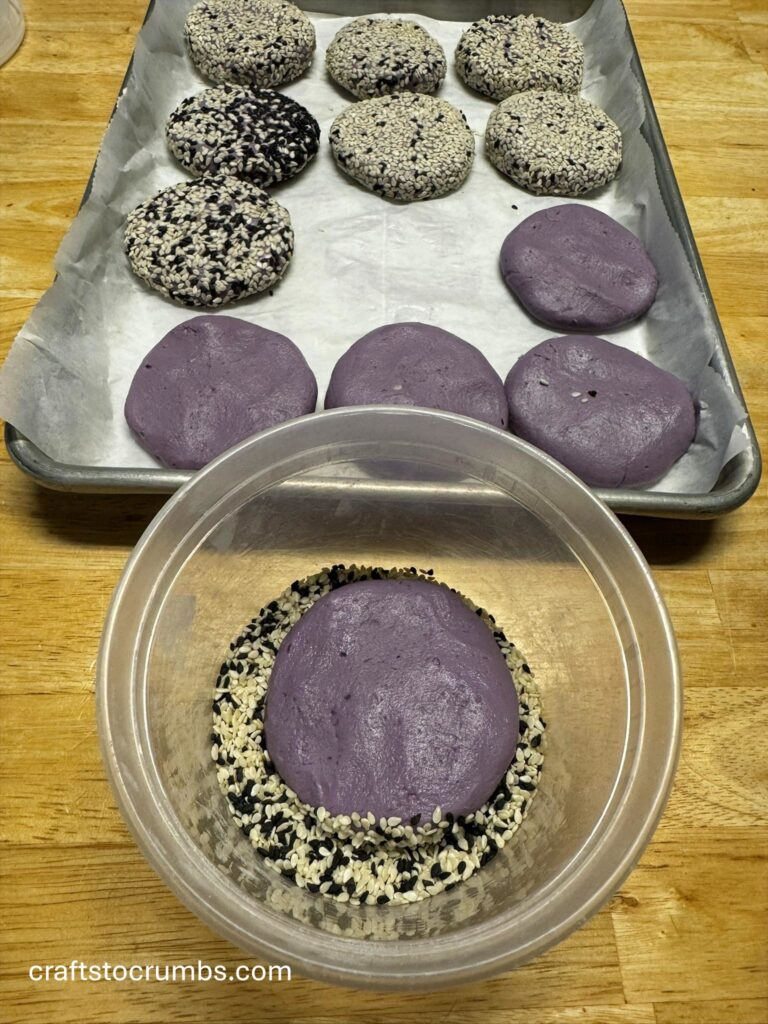
3-4 tablespoons sesame seeds (I like a combination of black and white sesame seeds)
Mung Bean Filling:
1 cup dried split mung bean, soaked at least 20-30 minutes
¾ cup (150g) granulated sugar
½ teaspoon salt
½ cup sweetened coconut flakes
- To make the mung bean filling, steam or boil the soaked mung bean until they easily mash when pressed in between your fingers. This may take about 20-25 minutes. While the mung bean is still hot, transfer them into a bowl and add sugar and salt. The residual heat from the mung bean should dissolve the sugar and salt. Fold in the coconut flakes.
- Scoop spoonfuls of the filling, roll into one-inch balls and set aside.
- To make the dough, in a large bowl, combine sticky rice flour with sweet potato puree. Add a tablespoon of sugar to the warm water and stir to dissolve, if using. Slowly add the water to the flour mixture. Knead until the dough comes together. It should feel like playdough. If it’s too wet, add more flour. If it’s too dry, add water, one teaspoon at a time.
- Pinch off small pieces of dough. Roll into small balls and then flatten into a disc. Place one of the mung bean filling balls in the center of the disc. Fold the dough to envelop the filling. Roll into a larger ball. Then flatten the ball.
- Add the sesame seeds into a small bowl. Toss the flatten dough with filling in a bowl and coat with the sesame seeds. If the dough is too dry and the seeds don’t stick, brush a little bit of water on the dough with your fingers.
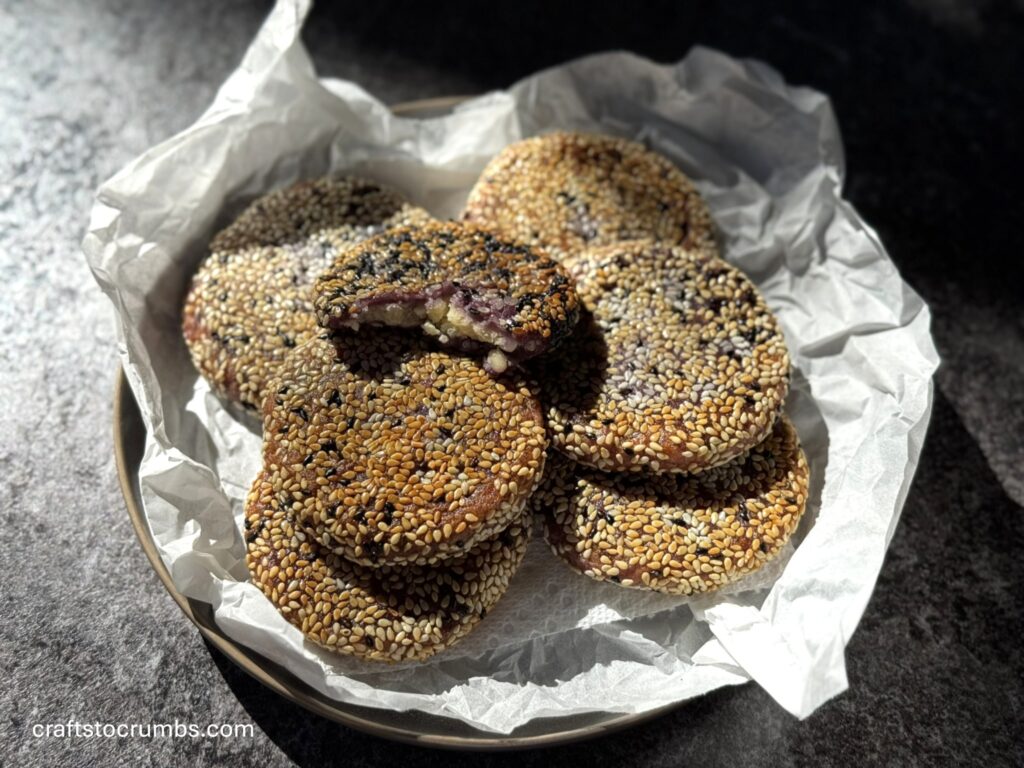
- In a deep fryer or heavy bottom pan, heat oil to about 350℉. Fry 1-2 minutes per side. Fry the cake in batches, making sure to turn at least once for even cooking. They should be golden brown. They will slightly puff in the deep fryer but will deflate again after they are removed from the fryer.
- Remove from the fryer with a slotted spoon and place on a paper towel lined plate.
- Enjoy!
Discover more from Crafts to Crumbs
Subscribe to get the latest posts sent to your email.